 | Xilinx in Linux |
This page gives an introduction to using the Xilinx toolset in a Linux environment. The Xilinx toolset is primarily designed for a Windows environment, but Xilinx does support its use under Wine. The first part of this page will analyze how a simple VHDL project is implemented in a Windows environment. The second part will concentrate on the installation and configuration of Wine. The third and final part will take the simple Windows project and implment it from Linux.
System Setup
The Linux distro is Debian with a 2.4.18 kernel. The Xilinx toolset used is ISE 4.2i. The choosen design flow is VHDL, although most of what's presented here should still apply to other design flows. The target device is a BurchED evaluation board, which has a Xilinx Spartan 2E (XC2S300E) FPGA. The FPGA is programmed by a parallel port B5-X Advanced Download Cable, which is also available from BurchED. The PC used has a Pentium 4 2.0GHz processor with 512MB RAM. For a more detailed description of the PC hardware and Linux, see the Linux Setup page.
The Xilinx Tools
Before a VHDL design can be implemented within an FPGA it must go through a series of processes. These processes are:
1) Synthesize
2) Translate
3) Map
4) Place & Route
5) Generate Programming File
6) Configure Device
The Xilinx toolset provides a user friendly interface to the these processes in the form of the Project Navigator.
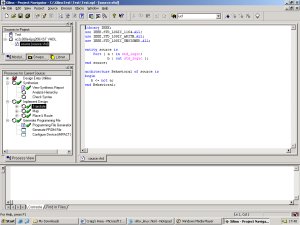
In a Windows environment the Project Navigator gives the user total control over each process. Behind each process there is a command line tool, which is also available to the user. For my Linux setup I choose to use the command line approach rather than the Project Navigator. I've never tried running the Project Navigator in Linux so I don't even know if it would work. This page will only concentrate on running the Xilinx toolset from the command line.
Although the Project Navigator is not going to be used in Linux, it can be used in a Windows environment to determine which command line tools are required and how to use them. Everytime the Project Navigator performs an implementation process it generates a log file of the command line tool it used. And second to this, the parameters passed to the command line tool are written to a file. This resulting file can be edited (if necessary) and used within our Linux system.
As a way to test the Linux system a simple VHDL project is created and then implemented from within the Project Navigator (under a Windows operating system). The log files can then be analyzed to determine how to implement the same project from within Linux. The command line tool parameter files can also be used within Linux. For this example, the project created was called test and it consisted of a single VHDL source file called source.vhd, which contained the following simple program:
      library IEEE;
      use IEEE.STD_LOGIC_1164.all;
      use IEEE.STD_LOGIC_ARITH.all;
      use IEEE.STD_LOGIC_UNSIGNED.all;

      entity source is
          port ( a : in std_logic;
                 b : out std_logic );
      end source;

      architecture source_arch of source is
      begin
         b <= not a;
      end source_arch;
The project also contains a constraints file called source.ucf, which contains the following two lines:
NET "a" LOC = "p57";
NET "b" LOC = "p82";
After the project went through the necessary processes to implement it within the FPGA, the log files were analyzed. The following shows which command line tools are used as well as showing the name of there respective parameter file.
| 1) | Synthesize | |
| xst.exe -ifn source.xst | ||
| 2) | Translate | |
| ngdbuild.exe -f ngdbuild.rsp | ||
| 3) | Map | |
| map.exe map.rsp | ||
| 4) | Place & Route | |
| par.exe -f par.rsp | ||
| 5) | Generate Programming File | |
| bitgen.exe -f bitgen.rsp | ||
| 6) | Configure Device | |
| Covered in a later section. |
The executables are located in the Xilinx/bin/nt directory and the parameter files can be found in the project directory. Each of the parameter files is an ASCII file, which can edited from outside the Project Navigator. As your projects grow in size and complexity you'll no doubt need to make changes to the parameter files. You could load up the Project Navigator in a Windows environment and have it make the changes for you, but this would defeat the object of using the tools under Linux. A far better way (and a more Linux way) is to refer to the command line documentation and change the parameter files manually (from Linux). Each of the command line tools is well documented in the Development System Reference Guide, which is available from the Xilinx website.
The simple VHDL project, which has been implemented from within the Project Navigator, can now be implemented from the command line. But first one small change must be made to the par.rsp file. The line which refers to par_temp.ncd should be replaced with source.ncd. Once the par.rsp file has been updated, you will only need the source.prj, source.ucf and source.vhd files to use the command line tools.
Installing the Software in Linux
To run the tools in Linux you need to use Wine. You can either download Wine as a precompiled package for your Linux distro or you can download the source and compile it yourself. Originaly I tried to use the precompiled Debian package, but failed to get it working with the Xilinx toolset (this was probally due to my settings rather than the Wine package). In the end I downloaded the source and compiled it myself, which works without error. In most (if not all) cases I would advise compiling from source as you get the latest release and a fully configured installation. If you decide to compile the source yourself, you should refer to the Wine README for instructions.
Wine can either work with an existing Windows installation or it can create a fake Windows installation in your Linux system. In my case I choose to use a fake Windows installation as I'm not sure how well Wine can work with Windows XP Pro. Should you opt for a fake installation you will need to copy MSVCRT.DLL, MFC42.DLL, MSVCIRT.DLL and MFC40.DLL from a Windows system to your fake Windows system directory. In my case this directory is ~/.wine/drive_c/windows/system. The Wine installation script that comes with the source code automatically generated a config file. The only change I needed to make to it was to add the following entry:
[Version]
"Windows" = "winxp"
This assumes that you have copied the DLL's MSVCRT.DLL, MFC42.DLL, MSVCIRT.DLL and MFC40.DLL from a Windows XP system. If you have used a different version of Windows, then you need to change the [Version] entry to your version of Windows (make sure you get this right otherwise you'll get errors).
I've put my config file here so you can use it as a reference if needed. I've used previous versions of Wine in the past and if I remember correctly the old config files had entries for the drives. The version of Wine I'm using now has symbolic links to the drives instead so this config file may not apply directly to your setup.
You will also need to install msttcorefonts on your Linux system. The site www.whatever.com gives a good description of how to do this.
To install the Xilinx toolset in my fake Windows directory, I simply copied the Xilinx directory from my Windows XP partition (this can take quite a while to complete). Apparently you can install the software from the Xilinx installation CD's while in Linux (wine setup.exe), but I have not tried this.
The final thing I did was to copy my test VHDL project from my WinXP partition to my fake Windows installation. The files you will need are source.prj, source.vhd, source.ucf and the command line parameter files (all of the rsp files and source.xst).
Using the tools in Linux
Using the Xilinx toolset in Linux is fairly straightforward. The first thing you need to do is set 2 environment variables:
export XIL_LINUX_WINE=1
export XILINX=C:\\Xilinx
Now you can use the Xilinx toolset from the command line. To make sure everything is working correctly you should try and implement the VHDL test project. First change directory to your test project and then run the following sequence of commands:
| wine xst.exe -ifn source.xst | ||
| wine ngdbuild.exe -f ngdbuild.rsp | ||
| wine map.exe -f map.rsp | ||
| wine par.exe -f par.rsp | ||
| wine bitgen.exe -f bitgen.rsp |
Again, I'm sure in older versions of Wine you needed to use '--' to pass parameters to the Windows applications (but I maybe wrong). So you might have to make some changes according to your Wine version.
Configuring the Device
Once the bitgen command has completed you should have a BIT file, which is ready to be downloaded to the FPGA. In the past I have used iMPACT to download bit files to the FPGA. At the time I was using Win2K Pro on my desktop computer and WinXP Home on my laptop, both of which worked without error. But now I have updated my desktop computer and laptop to WinXP Pro iMPACT no longer seems to work (it fails to find the programming cable). I also briefly tried iMPACT in Linux under Wine, but with no success (I didn't put any time into making it work).A free JTAG programmer is available for Windows (including WinXP Pro) and Linux, which I have used without any problems. The programming software is called NAXJP and can be downloaded from www.nahitech.com (the site is in Japanese, but the software runs in English). Once you've installed the NAXJP in your Linux environment, enter the following at the command prompt to download your bit file (making the relevant changes for your type of FPGA):
naxjp -auto XC2S300E:source.bit
Conclusion
The project used here only uses a small part of the Xilinx toolset, but its still a good demonstration of how straight forward it is to get the Xilinx toolset working under Linux.